Blogs
4 Easy Steps on How to Make an AI Assistant/AI Agent on CollabAI!
Blog
June 3, 2023 • 6 min read
Creating a personalized AI assistant or AI Agent for your business can seem daunting, but what if I told you there’s a streamlined, user-friendly way to not only construct your very own assistant but also ensure it becomes an integral part of your customer engagement strategy? Welcome to BuildYourAI, where building an AI assistant (or AI Agent as some call it) is not just simple—it’s transformative for your business.
Whether you strive to enhance customer support, boost lead generation, or provide on-point sales assistance, an AI assistant tailored to your specific needs can revamp how you interact with your clients and manage workflows. In this blog, with just four easy steps, you’ll be well on your way to creating an AI Assistant/AI Agent, embracing the change, outpacing competition, and redefining customer interaction —let’s get started!
What is an AI Assistant/AI Agent?
An AI Assistant or AI Agent acts as an intelligent interface that responds to users’ queries within your applications, powered by the Assistants API. It’s crafted to simplify user interactions by meticulously following a set of predefined instructions, utilizing advanced algorithms, and accessing an array of tools—such as interpreting code or searching through documents. Currently, AI Assistants are enhanced by three main functionalities: executing code, retrieving data from files, and invoking specific commands.
To discover the full potential of the Assistants API, you can systematically integrate an assistant into your application using our detailed guide.
Useful Questions to Find the Perfect AI Assistant Solution

Before creating an assistant understand chatbot intent. it’s essential to assess your business needs and determine the right AI chatbot solution. Here are some useful questions to consider:
- What are your primary goals for implementing an AI Assistant/AI Agent? (e.g., customer support, lead generation, sales assistance)
- What channels do you want your assistant to be available on? (e.g., website, mobile app, messaging platforms)
- Do you require multilingual support for your assistant?
- How complex are the conversations you expect your AI agent to handle?
- Do you have existing customer data or knowledge bases that can be used to train the chatbot?
- What level of human intervention or handoff is required for more complex queries?
- What is your budget for implementing and maintaining the assistant solution?
By answering these questions, you’ll have a better understanding of your AI Assistant/AI Agent requirements and can choose the right solution that aligns with your business goals.
How to Create an AI Assistant/AI Agent in 4 Steps:
-
Define the Basics:
Once you sign up for CollabAI, you’ll land on the Dashboard that will later help you track your AI assistant’s usage, and performance and dig for insights.
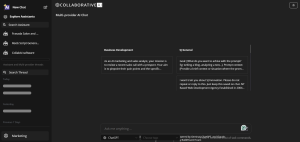
From the dashboard, you can create your own AI assistant/AI Agent. To do that:
Click on “My Assistants”
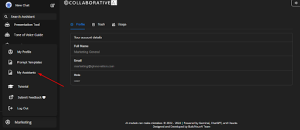
And then “Create New”.
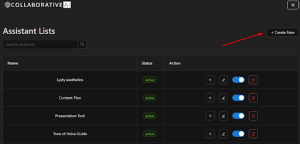
Next, fill in the details to create the assistant.
1 .Name
Choose a name for your AI that makes sense for its function and your business. It should be related to your AI Chatbot’s function, your business, or anything related to your customers unless you prefer to use your own name.
2. Instructions
Next comes “Instructions”. Here, specify what you want your AI Chatbot to do and what you don’t. Be clear about the dos and don’ts, guiding how it interacts with users and any boundaries it should not cross.
3. Description
Think of it as a specific “job description” for the AI chatbot. Provide a clear and concise description of your AI’s role. Describe what tasks it should perform, how it should communicate, and the overall behavior you expect. Mention the tone, style, and other nuances you want the AI chatbot to respond in.
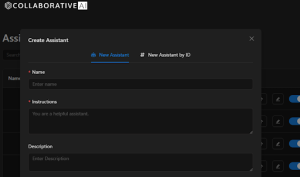
Great job! So far, we have named the AI Assistant and clarified what it is responsible for.
2. Train the AI Chatbot Based on Your Data
Next, it’s time to teach your AI Assistant/AI Agent by connecting it to your data so it can genuinely help your clients.
Under the “Conversation Starters” section, feed your chatbot with essential information like product details, phrases to begin conversations and examples of previous customer interactions. You can edit, upload, and validate text so that the AI can understand your company better.
Next, select the “Model” that is ‘GPT-4-1106-preview”.
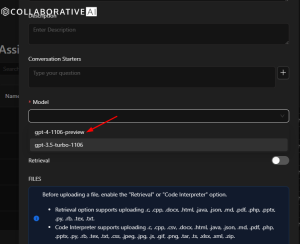
Next up, ‘Tools’ section:
Code Interpreter: Code Interpreter option enables the assistant to write and run code. This tool can process files with diverse data and formatting. It can even generate graphs!
Retreival: The ‘retrieval’ option enables the assistant with knowledge from files that you and your users upload. Once a file is uploaded, the assistant automatically decides when to retrieve content based on user requests.
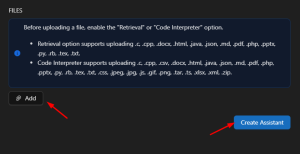
Note: Make sure you enable the “Code Interpreter” and “Retrieval” options before uploading a file!
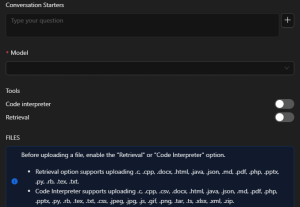
Select “Add” to attach files, PDFs, and text, that would align the AI Assistant/AI Agent according to your likes. After all, how can the AI assistant churn out blogs or press releases or give ideas about the company and its targeted niches without any knowledge of your company?
After that, click “Create Assistant” and test if it works…
There you go! You now have an AI Assistant/AI Agent that is aware of all the products on your website and can give you responses for what you want!
3. Personalize Your AI Chatbot:

As soon as you switch the slider on, your AI Assistant/AI Agent is active. However, this initial version is pretty basic. To create standout interactions between the AI assistant and your clients, it’s essential to keep updating the assistant. How can you do that? By adding better prompts so the chatbot’s performance gets better with time.
Test, test, and test some more
Before you introduce your AI Chatbot to your audience, it’s crucial to rigorously test its responses. Make sure it communicates the way you want it to by posing a variety of questions your customers might ask.
Evaluate the chatbot’s replies to ensure they align with the guidelines and parameters you set out in the “Description” and “Instructions.” Through this testing phase, you will need to refine its responses to enhance the chatbot’s accuracy and effectiveness.
4. Go Live!
- After you’re satisfied with the chatbot’s performance, deploy it to your preferred communication platforms.
- Introduce the chatbot to your customer base and motivate them to engage with it.
- Constantly monitor it, track how the chatbot is doing, collect feedback from users, and implement necessary enhancements periodically.
Follow these steps to build a chatbot that fits your business perfectly, offering your customers swift support and a better experience. Building a great chatbot is a journey, with regular updates being essential for keeping it effective.
Ready to upgrade your customer service with a custom AI Assistant/AI Agent? Start crafting your intelligent assistant today with BuildYourAI.

Shahed Islam
